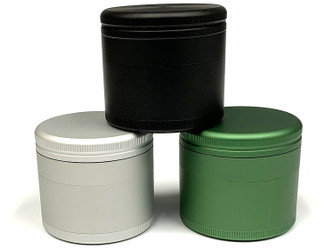
Weed grinders are essential to enabling an optimal cannabis experience. Weed grinders allow you to A) achieve a clean, even burn whether you’re using papers, custom glass pipes or your favorite custom bong and B) to roast as many trichomes as possible in order to maximize your buzz.
Like most tools, however, weed grinders are not maintenance-free. Refuse from earlier grinds tends to accumulate around parts of the grinder mechanism and over time it can foul your weed and undermine your enjoyment. The solution is periodic cleaning of the grinder. But what’s the best way to do that? We’re glad you asked.
Below we're going to take you through the process of returning your grinder to a sparkly state of clean. Enjoy.
Why You Should Clean Your Grinder
Before we get into how to clean your grinder, let’s take a minute and look a little more carefully at why you should bother to clean your grinder on a fairly regular basis.
- Reason 1: A clean grinder is a healthy grinder - Nobody wants to think that any aspect of their cannabis practice could potentially make them sick. The truth is, however, that cannabis is (or at least was) living plant matter. And like the remains of any formerly living thing, it will decompose over time and invite microbial invaders. At some point, these dastardly microbes will find their way into your bowl or papers, and then you'll be inhaling them. Not good.
- Reason 2: It helps your grinder do its job - The engine on your car isn’t going to perform up to its potential if you never change the oil or take it in for a tune-up. Likewise, your grinder isn't going to churn out that nice fluffy, evenly ground product if you let it become caked with the detritus of a thousand earlier grinds.
- Reason 3: Because you respect your friends - You wouldn’t expect your friends to drink out of a dirty glass or eat off a dirty plate. Why would you expect them to toke on weed that’s been playing footsies with bacteria in a dirty grinder?
How Often Should You Clean Your Grinder?
It depends to some extent on how often you use it. If you’re a dedicated stoner you should clean it once a month. If you only take out your customized bong a couple of times a week to enjoy a bowl or two then cleaning your grinder every 3 to 6 months should be sufficient.
Now that we’ve got the preliminaries out of the way, let’s go through the process of cleaning your grinder.
Follow These Steps to Get Your Grinder Sparklingly Clean
Step 1: Take the grinder apart
As is the case with custom bongs, different grinders have a different number of parts they can be broken down into. Simply break yours down into as many parts as possible. If your grinder has a removable screen between the collection and kief chambers be careful when handling it. Most are pretty fragile. Once you’ve broken your grinder down into as many pieces as possible move on to step 2.
Step 2: Pop the pieces into the freezer
Put all the pieces onto a clean plate and pop it into the freezer for about half an hour. Why? Because it will make any sticky stuff inside dry and brittle and easier to remove. You’ll probably find a lot of gunk has accumulated on the screen we mentioned above. Freezing it will make it much easier to clean.
Step 3: Remove the excess plant matter
After you take the parts out of the freezer it should be relatively easy to remove most of the excess material in the grinder. Simply tap the different parts on the plate to collect the material. If parts are resisting use a toothpick to gentle scrape material off. When you’ve removed as much as possible this way then brush everything down with an old toothbrush or small paintbrush.
Some will suggest you should keep the material you tap and scrape off. But one of the points here is to get rid of all the old, potentially microbe-infested plant material so that no one winds up smoking it. Holding onto the detritus and sparking it up later defeats that purpose.
Step 4: Soak the parts
If you have a metal grinder you’ll want to soak the parts in a bowl of isopropyl alcohol in order to kill the aforementioned bacteria that might be clinging to the walls or other parts of the grinder. Leave the parts soaking until the alcohol turns a light brown or until you are certain you do not see any more debris clinging to the various parts.
If you have a plastic grinder boil up a saucepan of water and then plop the various pieces into the boiling water. Turn the heat down until it’s barely boiling and let it simmer thusly for about a minute. Then turn the stove off and remove the parts using tongs or some such thing and let them cool back to room temperature, which should take around 10 minutes.
Step 5: Put the grinder back together
Once all the pieces have cooled and dried out simply put them back together and enjoy a delightfully clean smoke next time.
We hope you found the above tips useful and remember, whether you’re looking for grinders or you’re looking for a source for wholesale glass pipes, the Puffr wholesale head shop is the place to find them.

 US Dollar
